Plesk 8 (Linux) end-user series
26. How to password-protect a directory
This demo assumes you've already logged in to Plesk
Now let's learn how to create a password protected directory in Plesk
Scroll down
1) Click the Directories icon here
As you can see here, there are currently no password protected directories in our account
2) Let's go ahead and create one..... click Add New Directory
3) Enter the name of the directory you wish to protect here
4) Enter the Header Text here..... it is the text that will display in the title bar when users are prompted for their username and password
Note: If the directory does not yet exist, Plesk will create it as well as protect it
5) Click OK
The directory /clients has been created and protected. We now must add at least one user who can access the protected directory
6) Click Add New User
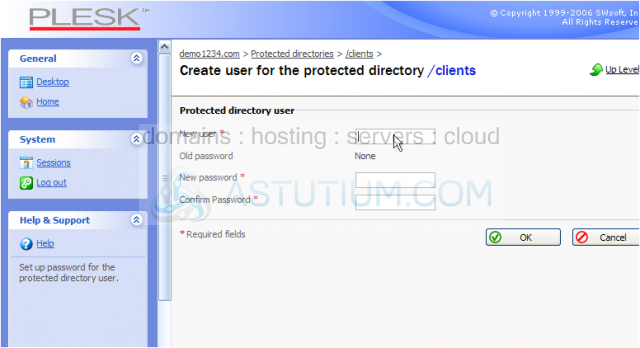
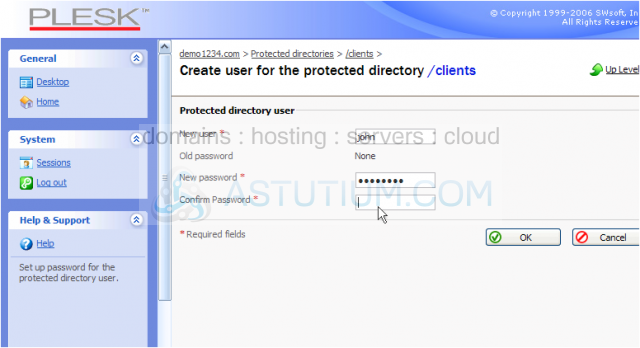
7) Now choose a username and password for this user
8) Confirm the password by re-entering it here
9) Click OK when finished
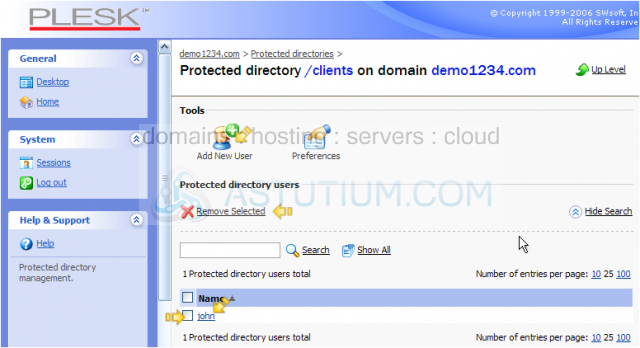
That's it! A new user has been created for the directory we protected.
You can add more users to this protected directory by repeating this process.....
Or you can delete users by selecting them here.....
Then clicking the Remove Selected link here
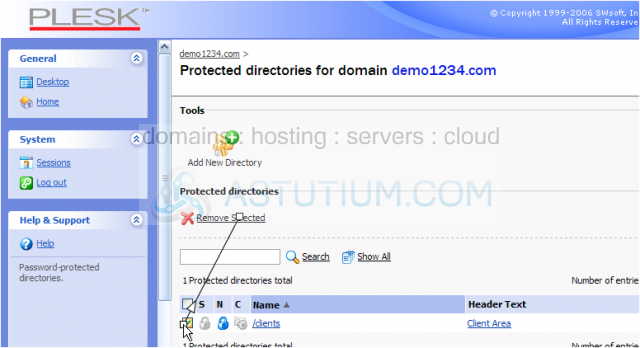
10) Let's go back to the protected directories page..... click here
Now let's remove the password protection from the /clients directory
11) Confirm the removal by clicking here, then click OK
Take note that removing the protection from a directory does not remove the directory itself
Password protection has been removed from the /clients directory
This is the end of the tutorial. You now know how to password protect a directory in Plesk, and create/manage users for access to protected directories