WHM 11 accounts series
24. How to view a list of the accounts on your WHM server
WHM provides you with a tool to list all accounts on your server. If you've watched some of the previous tutorials in this series, you've probably seen the tool already.
1) Locate the Account Information menu.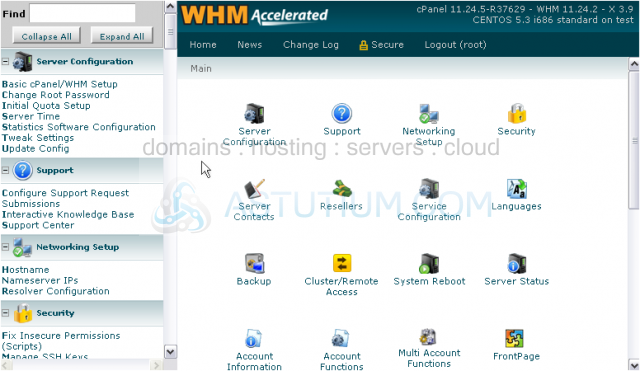
2) Click List Accounts.
3) Here is the Accounts List. Let's view this in a full-sized window so it's not so cramped.
By default, you'll see a list of every account on your system, which can be split up into pages. Each account has its own row in the table, specifying a variety of useful information about the account.
You can perform a Quick Domain Search for accounts using this form, which will show all accounts whose domains match your query.
4) Search by pressing Go.
As you can see, only those accounts whose domains contain the phrase "demo" will be displayed.
5) Click this link to revert the page to the default list.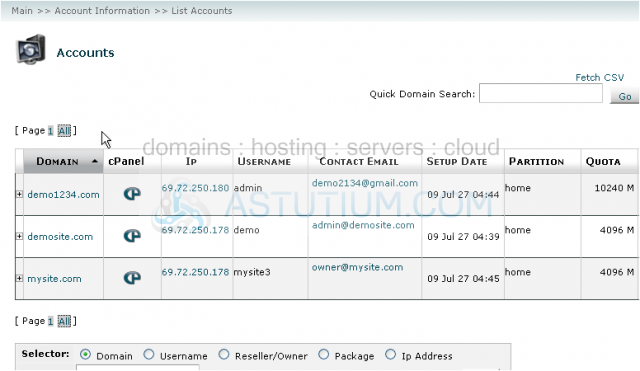
6) You can export a comma-delimited CSV file of all your accounts by clicking Fetch CSV.
Now, let's take a closer look at the information contained in the table.
The list can be sorted using the data in a specific column by clicking its header link. As you can see, we're currently sorted in ascending order by Domain.
Clicking the plus sign + next to an account will give you access to a simple form allowing you to change the account's password or contact e-mail.
If you click on the cPanel logo next to an account, you will be transferred to the account's cPanel, without needing to log in.
7) Hovering over an account's row will show edit links for a number of settings.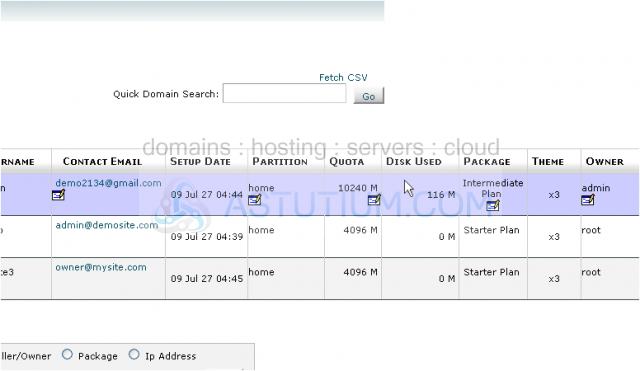
8) You can then click on the edit icon to edit that particular setting for the account.
9) At the bottom of the page is a more advanced search box. You'll see all about using this in the tutorial that follows.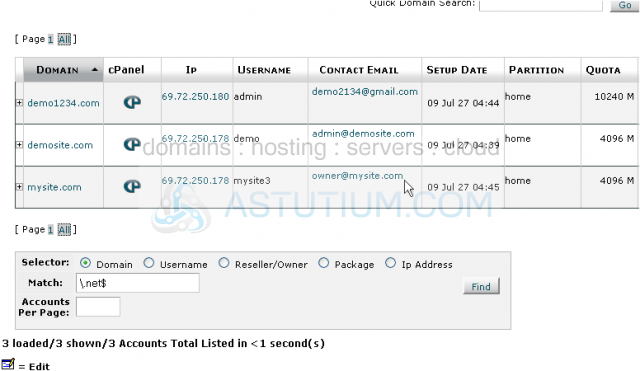
10) Apart from the advanced search feature, that's all there is to see and do here. Close this window or tab to return to the standard WHM view.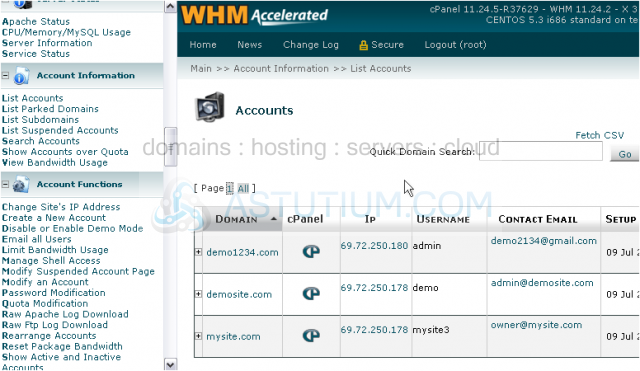
This tutorial is now complete. You now know how to use the Accounts List in WHM.