RVSiteBuilder 4 series
5. Changing your page structure in RVSiteBuilder
This tutorial assumes you've already logged in to RVSiteBuilder. Now let's learn how to change our website's page structure
1) Click the Step 4 Page Structure option
2) This is the Page Structure page, where you can define exactly what pages are to be included in your website. Here you can see what pages are suggested, based on the default page structure you chose. Hold down the CTRL key and select all the pages you wish to add. Then click the Move button.
3) We now have several pages selected for inclusion in our website.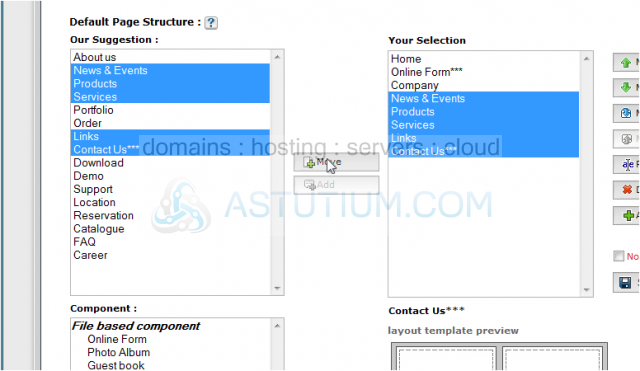
4) However, we can further customize this list of pages. To adjust the position of a page within the list, select it by clicking on it's name, then click the Move Up link.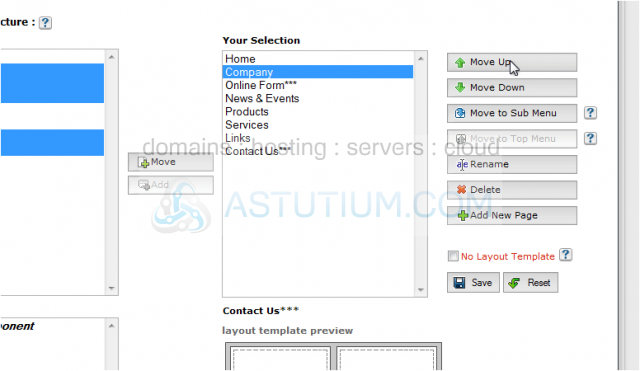
5) We can also move pages down in the list.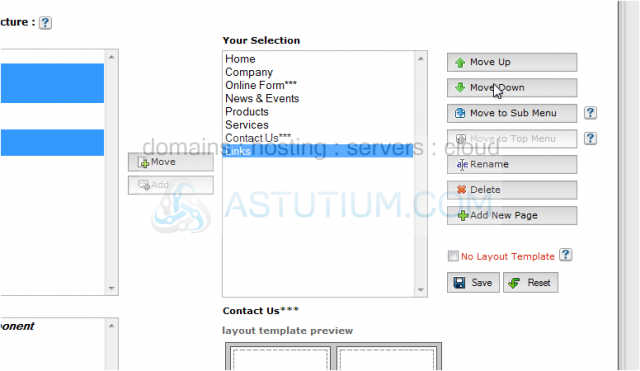
6) To make a page into a sub-page of another (and thus have it display as a sub-menu), select it then click the Move to Sub Menu link. Clicking the Upper Level link moves the page back to the same menu level of the other pages.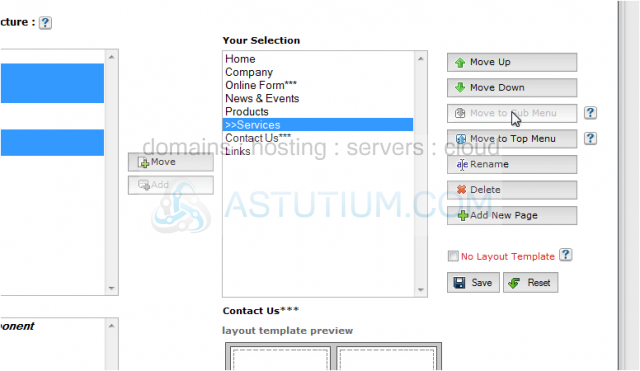
7) Click the Rename button to rename a page.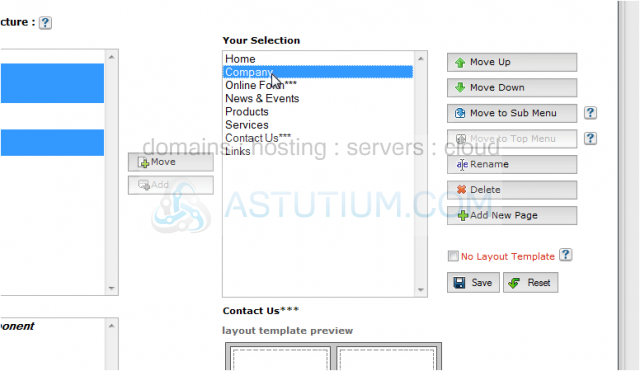
8) Click Delete if you want to delete a page from the list. ..... and click the Add New Page button if you want to add a new page to the list.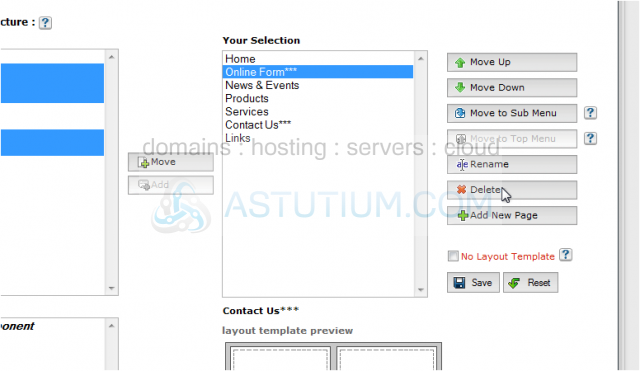
9) When satisfied with your list of pages, click the Save button.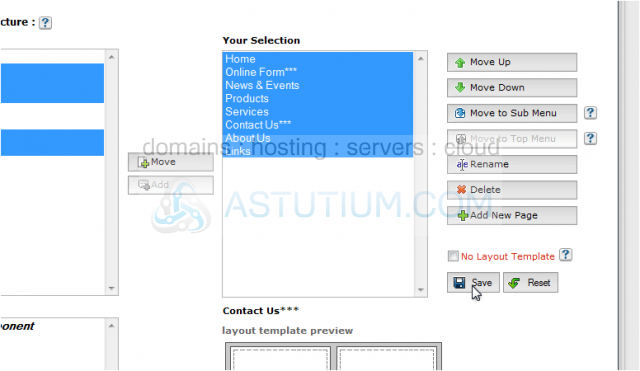
10) Anytime you make a change to your website, you have to Publish it for the effects to take effect..... click Step 7 Publish... then click Publish.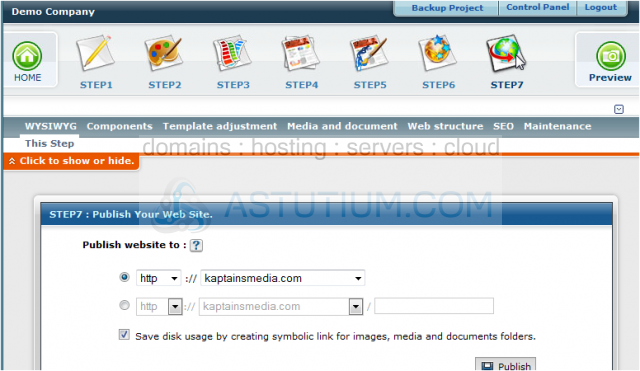
11) Click Next to overwrite the current website.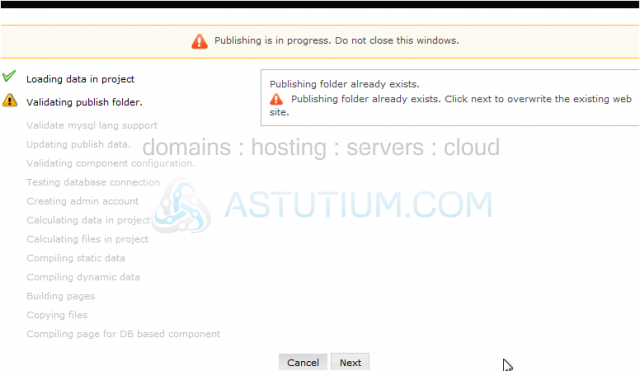
12) The published site will open in a new tab.
This is the end of the tutorial. You now know how to change your page structure in RVSiteBuilder. Remember that you have to publish any changes you make for them to take effect