Direct Admin reseller series
8. How to manage your IP address pool
This demo assumes you've already logged in to Direct Admin as a reseller
Now let's learn how to manage our IP address pool from Direct Admin
Scroll down.....
1) Click the IP Management link
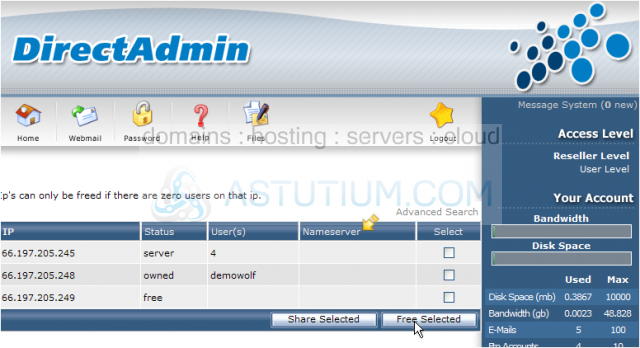
This is the main IP address management page, and lists all IP addresses that can be used with this reseller plan
The IP address with status set to server, is used with name-based accounts set to share the server's main IP address
If an IP address has it's status set to owned, then that IP is being used as a dedicated IP address for 1 specific account (shown here)
If an IP address has it's status set to free, then that IP can be used as a dedicated IP address for any new accounts to be created
From this IP management screen, you can change free IP addresses into shared IPs if you wish
2) Let's do that now.... click here
3) Then click the Share Selected button
The status of that IP address is now set to shared as indicated here
4) Let's change this IP address back to free
If this account had it's own custom nameservers setup, then the nameserver column would show which IPs the reseller's nameservers were using
5) Click the Home icon here
This is the end of the tutorial. You now know how to manage your IP address pool. If you need more IP addresses than are listed on your IP management screen, you'll have to contact your reseller plan provider