H-Sphere 3.x end-user series
23. How to create a new domain in H-Sphere
This tutorial assumes that you've already logged into your H-Sphere control panel
Now let's learn how to create a new domain and have it hosted within H-Sphere control panel
1) Scroll over Domain Settings
2) Then click Add New Domain
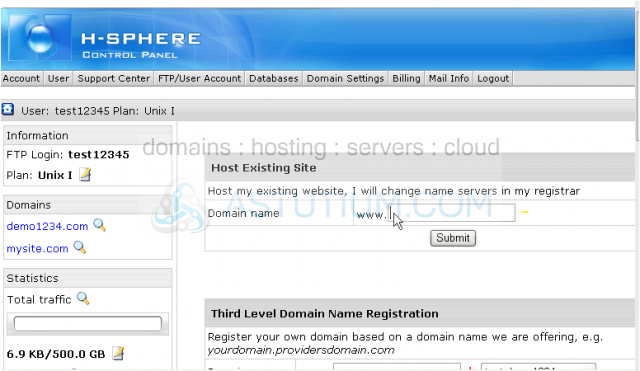
In this section you can set up new websites to be hosted within your account
If you already have a domain name (registered elsewhere) but want to host it within your H-Sphere account you may add its name here
If you want to host a website with a third level domain (i.e. yourdomain.providersdomain.com) fill out this section. You don't need to register such a domain with an official domain registrar. Functionally, third level domains have same features as second level domains
If you wish to enable mail service for this third level domain fill out this section
You may also host sites without domain names, in this case no DNS zone is created and you cannot use email service but website management and FTP services are available. You may access your site by its instant domain alias or by a dedicated IP address
If you simply want to park a domain but have it hosted elsewhere fill out this section
Scroll back up to the top
3) In this tutorial we will set up a new website with its own top-level domain...enter the new domain name here
4) Then click Submit
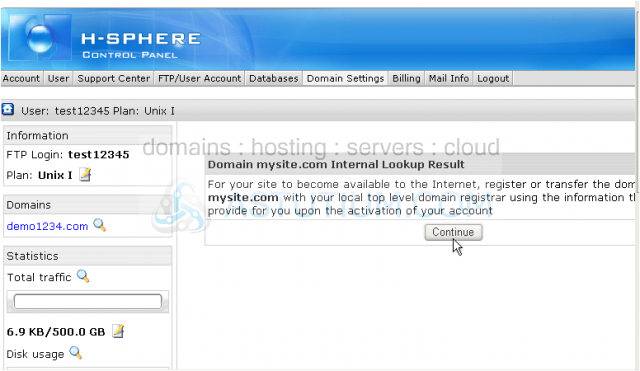
You will have to update the DNS or nameserver settings for the domain mysite.com at the registrar where you have registered this domain
Usually the DNS settings are provided to you by email from your hosting provider upon the activation of your account
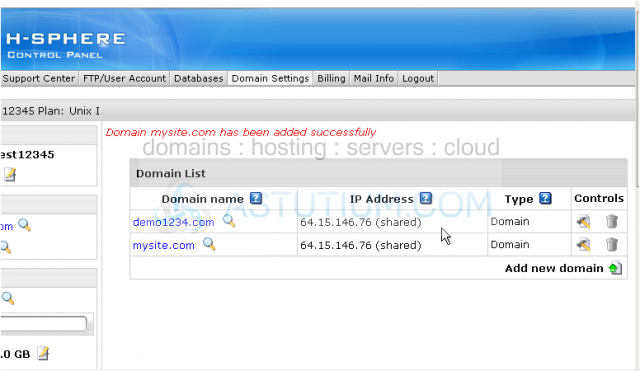
We're done now! The account for mysite.com has been set up and you may see it here now
5) From this area you may edit your newly created domain by clicking here...
6) ...or you may delete it by clicking on this icon
7) You may add a new domain by clicking here. The number of domains that you can add depends upon your plan type
This is the end of the tutorial. You now know how to create/add new domains in your H-Sphere control panel